why make this recipe
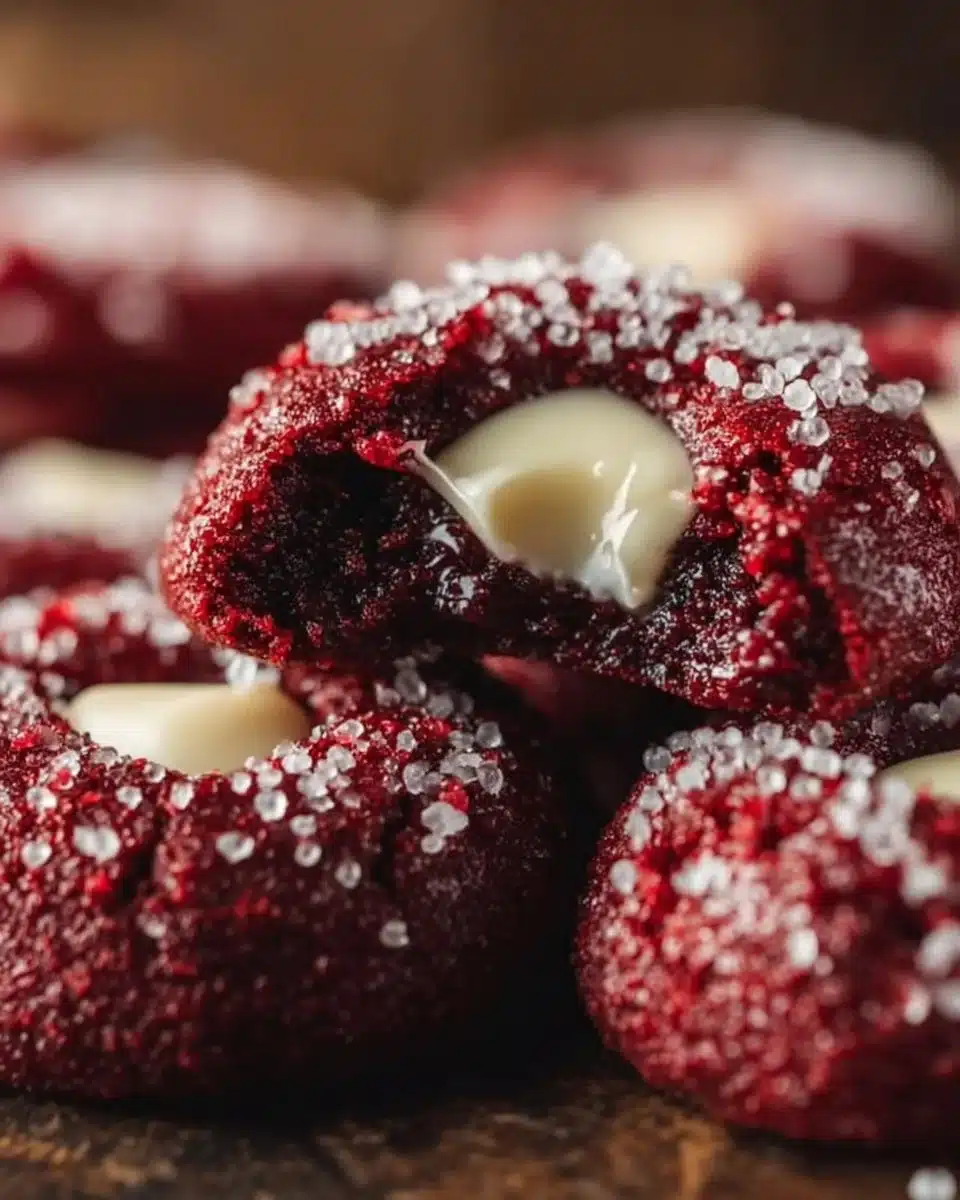
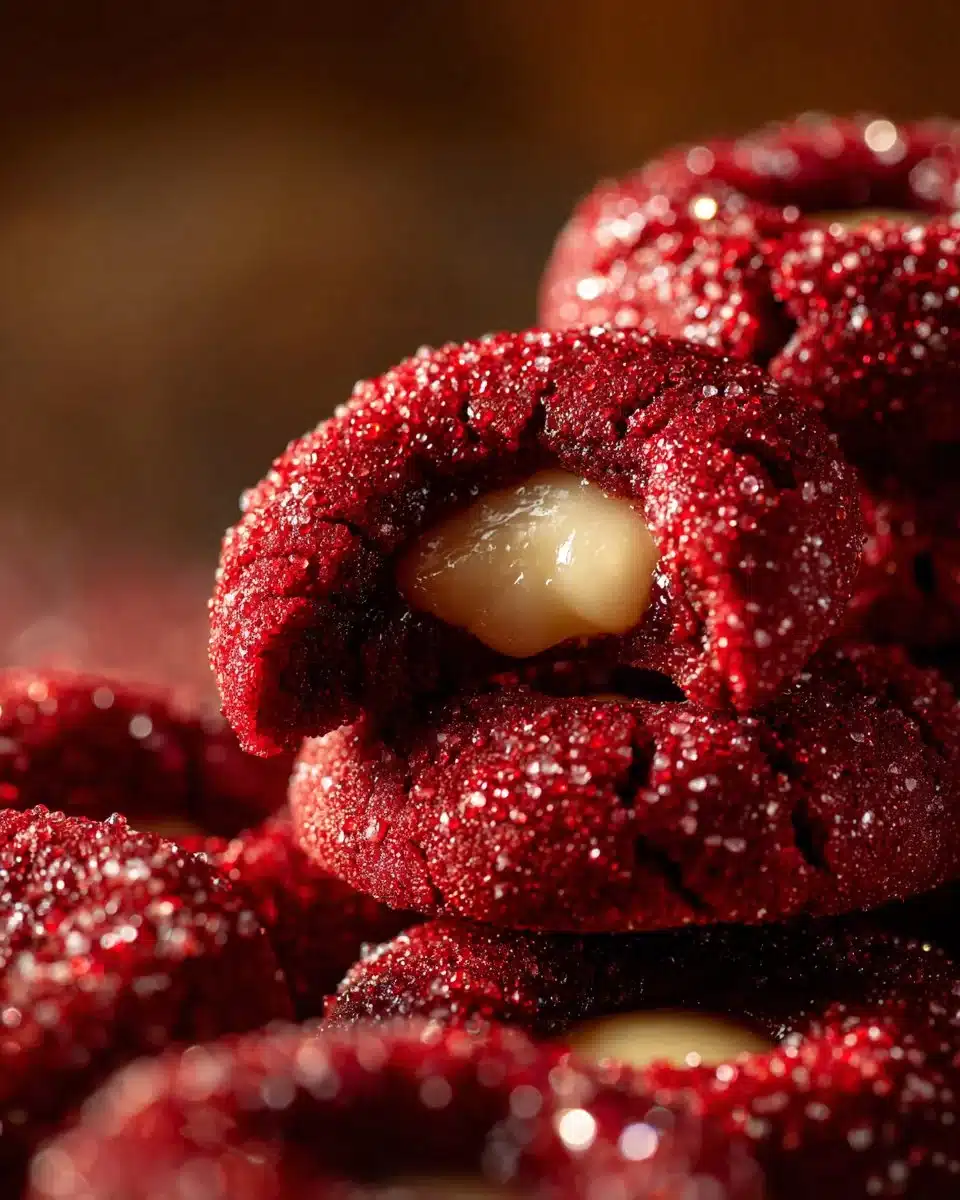
I love a cookie that feels special and simple. These red velvet thumbprint cookies do both. They look festive. They taste soft and tangy. The cream cheese filling gives them a little richness. If you like the tang in my cream cheese sugar cookies, you’ll understand why I reach for this filling when I want something a bit fancy but still easy.
how to make Red Velvet Thumbprint Cookies
Ingredients:
For the Cookies:
2 and 1/4 cups all purpose flour
1/4 cup unsweetened cocoa powder
1 teaspoon baking soda
1/2 teaspoon salt
1 cup unsalted butter, softened
1 and 1/2 cups granulated sugar
2 large eggs, at room temperature
1 teaspoon vanilla extract
2 tablespoons red food coloring
1/2 cup buttermilk
1/2 cup granulated sugar (for rolling)
For the Cream Cheese Filling:
8 ounces cream cheese, softened
1/2 cup unsalted butter, softened
4 cups powdered sugar, sifted
1 teaspoon vanilla extract
Directions:
- In a medium bowl, whisk together the flour, cocoa powder, baking soda, and salt. Set aside.
- In a large bowl, cream the softened butter and granulated sugar until light and fluffy. Beat about 2 to 3 minutes.
- Beat in the eggs one at a time. Mix well after each one. Stir in the vanilla and red food coloring. The dough will be bright red.
- Add the dry ingredients and buttermilk alternately to the wet ingredients. Begin and end with the dry ingredients. Mix on low until just combined. Do not overmix.
- Cover the dough and chill for at least 30 minutes and up to 2 hours. Chilling helps the cookies hold their shape. If you love soft cookies, my tips in the best chocolate chip cookies post also help keep a tender crumb.
- Preheat the oven to 375°F (190°C). Line baking sheets with parchment. Pour the 1/2 cup rolling sugar into a shallow dish.
- Scoop rounded tablespoons of dough and roll into smooth balls. Roll each ball in the sugar to coat. Place them about 2 inches apart on the baking sheets.
- Use your thumb or the back of a small spoon to press an indent into the center of each dough ball. Do not press through.
- Bake 8 to 10 minutes. Watch closely. The edges should be set and lightly browned. The centers can still look soft. Cookies will finish setting as they cool.
- While the cookies cool, make the filling. Beat the cream cheese and butter until smooth. Add the powdered sugar a cup at a time until fluffy. Stir in the vanilla.
- Once the cookies are completely cool, spoon or pipe the cream cheese filling into each indent. Serve right away or chill to set the filling.
how to serve Red Velvet Thumbprint Cookies
Serve them with a warm drink. Coffee and black tea both work. They also pair nicely with a scoop of vanilla ice cream for a playful dessert plate. If you like mixing cookie flavors on a platter, these go well beside the rich notes of my caramel cheesecake cookies.
how to store Red Velvet Thumbprint Cookies
Store in an airtight container in the fridge. The cream cheese keeps best cold. Layer cookies with parchment so they don’t stick. They stay fresh for about 4 to 5 days. You can freeze baked cookies (unfilled) for up to 3 months. For freezing tips, I use the same method I recommend for my cranberry orange cookies.
tips to make Red Velvet Thumbprint Cookies
- Chill the dough. It makes shaping easier and stops spreading.
- Use room-temperature eggs and butter. They incorporate better.
- Don’t overbake. The centers should look slightly soft. The cookies finish while cooling.
- If your cookies spread too much, chill the shaped balls for 10 minutes before pressing indents.
- Want a softer, cakier cookie? Add a touch more buttermilk or try rolling the dough slightly larger like in my banana bread cookies for a thicker bite.
variation (if any)
Swap the cream cheese filling for a white chocolate ganache for a sweeter twist. You can also top the filling with a few sprinkles for the holidays. For a boozy adult riff, fold a teaspoon of liqueur into the filling.
FAQs
Q: Can I make the dough ahead of time?
A: Yes. You can make the dough and chill it for up to 2 days. Keep it wrapped in plastic in the fridge. Bring to a slightly firmer chill before scooping.
Q: Can I skip the red food coloring?
A: You can. The cookies will be a muted cocoa color instead of red. They will still taste the same.
Q: How do I get smooth indents that hold filling?
A: Use your thumb or the back of a small spoon while the balls are slightly chilled. Press gently but firmly. If the indent springs back, chill for a few minutes and press again.
Q: Can I pipe the filling instead of spooning?
A: Yes. Use a piping bag with a small round tip for neat results. Chill the filled cookies for 10–15 minutes to set the filling.
Q: Are these cookies good for parties?
A: Yes. They look festive and hold up well on a platter. Just keep them chilled if the event is warm.
More recipes? Follow me on Facebook – Pinterest
Print
Red Velvet Thumbprint Cookies
- Total Time: 40 minutes
- Yield: 24 cookies 1x
- Diet: Vegetarian
Description
Festive red velvet thumbprint cookies filled with creamy filling, perfect for special occasions.
Ingredients
- 2 and 1/4 cups all purpose flour
- 1/4 cup unsweetened cocoa powder
- 1 teaspoon baking soda
- 1/2 teaspoon salt
- 1 cup unsalted butter, softened
- 1 and 1/2 cups granulated sugar
- 2 large eggs, at room temperature
- 1 teaspoon vanilla extract
- 2 tablespoons red food coloring
- 1/2 cup buttermilk
- 1/2 cup granulated sugar (for rolling)
- 8 ounces cream cheese, softened
- 1/2 cup unsalted butter, softened
- 4 cups powdered sugar, sifted
- 1 teaspoon vanilla extract
Instructions
- Whisk together flour, cocoa powder, baking soda, and salt in a medium bowl. Set aside.
- Cream softened butter and granulated sugar in a large bowl until light and fluffy, about 2 to 3 minutes.
- Beat in eggs one at a time. Mix well after each one. Stir in vanilla and red food coloring.
- Add dry ingredients and buttermilk alternately to wet ingredients, beginning and ending with dry ingredients. Mix on low until just combined. Do not overmix.
- Cover dough and chill for at least 30 minutes and up to 2 hours.
- Preheat oven to 375°F (190°C). Line baking sheets with parchment. Pour rolling sugar into a shallow dish.
- Scoop rounded tablespoons of dough, roll into balls and coat in sugar. Place on baking sheets about 2 inches apart.
- Use your thumb or a small spoon to press an indent in each dough ball.
- Bake for 8 to 10 minutes until edges are set and lightly browned. Cookies will finish setting as they cool.
- While cooling, beat cream cheese and butter until smooth. Gradually add powdered sugar until fluffy. Stir in vanilla.
- Once cookies are cool, spoon or pipe cream cheese filling into each indent. Serve immediately or chill to set.
Notes
Store cookies in an airtight container in the fridge; layer with parchment to prevent sticking. Freeze unfilled cookies for up to 3 months.
- Prep Time: 30 minutes
- Cook Time: 10 minutes
- Category: Dessert
- Method: Baking
- Cuisine: American
Nutrition
- Serving Size: 1 cookie
- Calories: 180
- Sugar: 14g
- Sodium: 110mg
- Fat: 7g
- Saturated Fat: 4g
- Unsaturated Fat: 2g
- Trans Fat: 0g
- Carbohydrates: 25g
- Fiber: 1g
- Protein: 2g
- Cholesterol: 30mg
Keywords: cookies, red velvet, dessert, thumbprint cookies, festive cookies